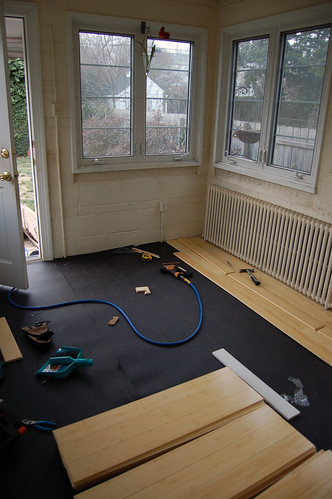
Not too long after we moved into our house, Angela and I tore out the old carpet in the sunroom and laid carpet tiles. We were actually very pleased with them; they’re good quality carpet and didn’t wear out. However, after getting a second puppy who had a large yet weak bladder (Maggie…), Angela quickly got tired of having to try and clean out the stains. She had wanted hardwood flooring in that room for sometime and last Saturday, my friend Johnny stopped by. We got to talking and decided that the next weekend (the past two days, that is) would be a good time for both of us to do just that. In order to maximize our time, we went to the big-box hardware store to find some materials.
We happened to find some bamboo hardwood flooring. It was at a really cheap price – roughly one third of typical 5/8″ hardwood – so we got five 24 ft2 packets. Another great thing about bamboo is that it’s fast growth material, which is great for the environment (and also the wallet).
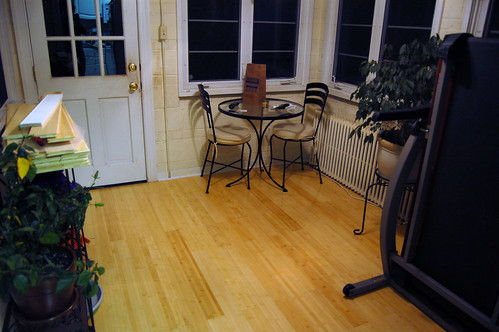
We got started yesterday morning after helping Johnny bring over some of his tools: a miter saw, table saw (which we didn’t need), air compressor, and nail gun (which we couldn’t have done without). We laid down some building paper which probably wasn’t necessary but i supposed to help with preventing squeaks. We snapped out beginning line and then spent the next two hours getting the first two boards around the radiator laid. The rest of the room went much faster, though. We tried to spend some time getting the edges right and we cut off some of the older molding such that it would set on top of the wood flooring, which looks much cleaner. We finished up last night with all but three boards laid.
This afternoon, we went to the big-box hardware store once again to get some additional floor edge molding to go around the room. We used a 5″ edge molding with a piece of quarter-round at the toe, similar to what occurs throughout our house. It’s an edge finish detail that is very forgiving for un-even walls, which also occur in spades throughout this house. It also looks quite fancy and we ended up with really nice finish. That took about four more hours this afternoon and the finished product is something that we’re all really pleased with.


It looks great!
Wow Very Cool!
this post pleases me.
Because it was a relatively short one, for me? :)
Good job. The floor looks great! Now, let’s see…what can I add to my “to do when the guys are home” list? I think I have an idea for my garage floor. :-)
We’ll be sure and plan to stay with you a little longer, then.