A few years ago when I was considering getting into more “fine” woodworking, there was one project that came to mind: recreating the footstools my grandfather, Cicero, used to make. He was a handy woodworker and built a lot of useful projects1 I know we had two or three of these footstools around the house growing up. I assume my aunts and cousins may have had some, as well. They’re perhaps not a master craftsman project, but let’s not over-estimate my abilities. As my mom put it, though, after about a half century, they’re still in use!

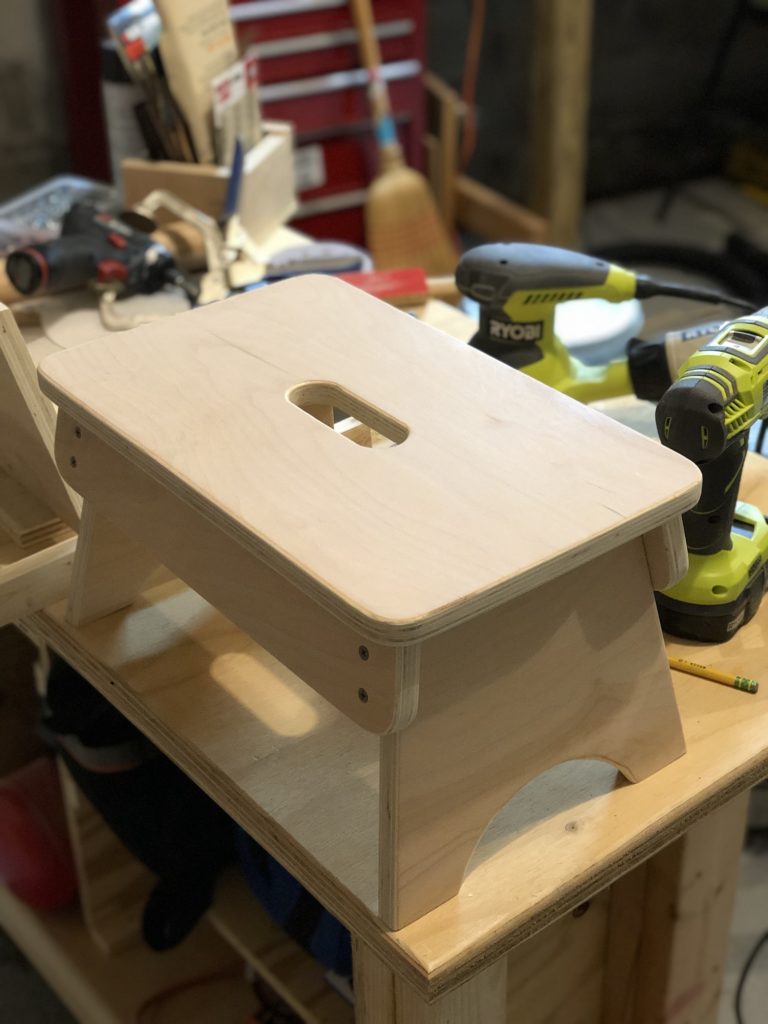
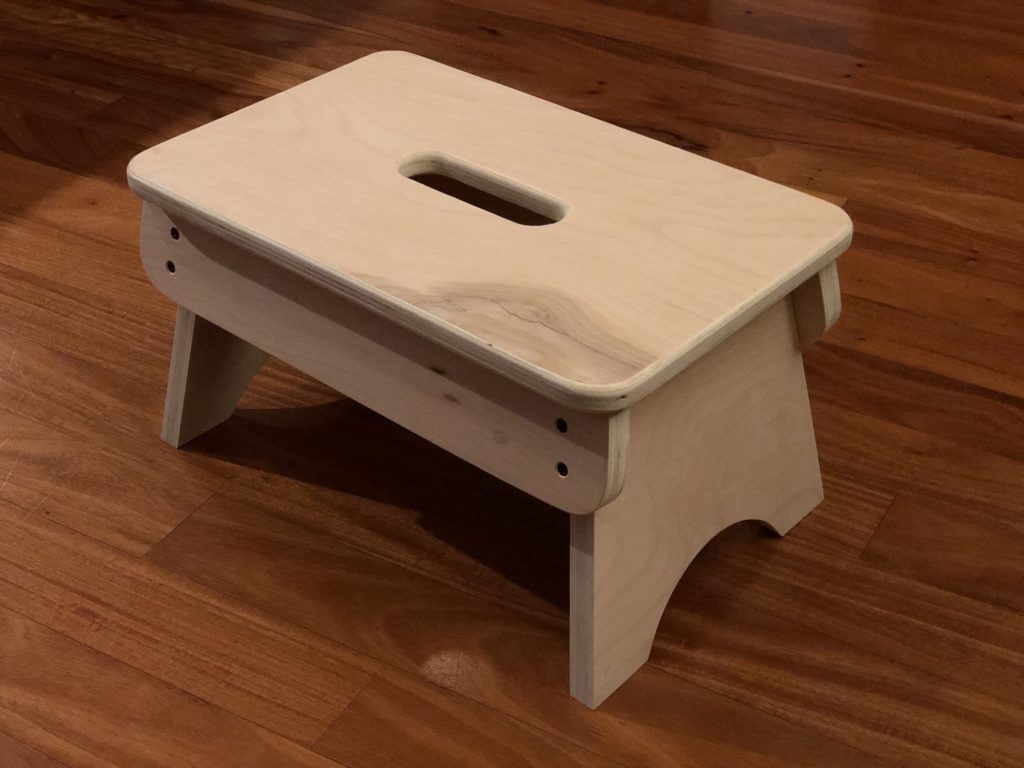
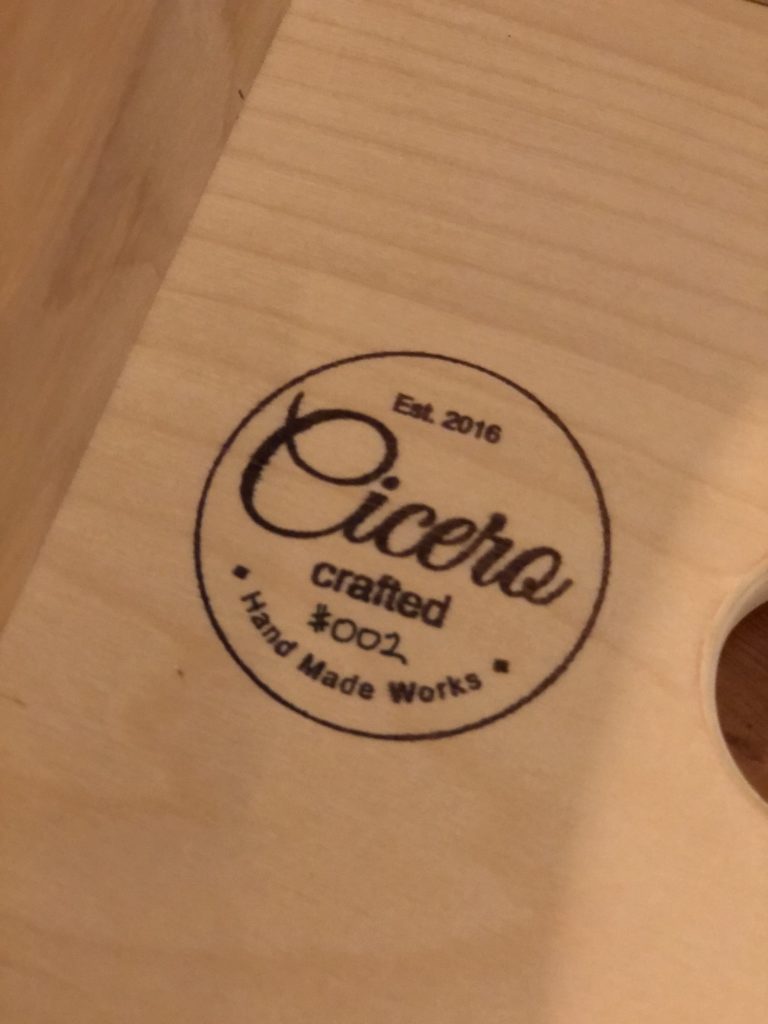
So in 2016 I sat down to carefully draw out the pieces. His were all made from 1″ thick solid pine, but I figured I’d use 3/4″ plywood instead. The legs and sides have a roughly 10° slant such that the base tapers up to give a slight lip all around the top footrest. I also decided to add a handhold to the top of mine (some others of his may have this, but the one that sits in our kitchen does not). On my notes and sketches, I also doodled out a logo that read “Cicero Hand Made Crafts. Est. 2016”. I figured he was the “maker” in my family so I’d honor that by labeling made items with his name.

It took me about a year-and-a-half until I actually got around to making my first footstool. I batched out the pieces on the table saw for two footstools from a 2’x4’ project board of 3/4″ maple plywood. Some of the angle cuts using my cut pattern resulted in a color mis-match in the wood, but this could probably be resolved by buying higher quality plywood in the future. The bandsaw was used for all curves, including cutting the arches in the legs at 10° (so they’re actually level when assembled). I used the drill press and a 1 5/8″ forstner bit to hog out material for the handle (which I then cleaned up with a series of rasps, files, and sandpaper). The disc and belt sander were used to clean up all the edges (with care not to remove any more finger nails). My super-simple router table was used to add a 1/4″ round-over to edges. I then used the random orbital sander to clean everything up.


Drill press to hog out handle 
Cutting curve at 10° slant 
Disc sander to clean edges

Router table 
Rounded edges 
Router in action
I used made an assembly jig for the first piece and used pocket holes to attach the legs to the top (something my grandfather didn’t have but he seemed like a practical enough person, he’d have used them if he could have). I attached the side runners to the legs with some counter-sunk wood screws (black). I used a light color wood filler for any ply gaps (or other blemishes). Finally, a generous coat of wipe-on polyurethane was applied for a finish.


I assembled the first footstool as a Christmas gift for my older brother last year and then completed the second footstool as a Christmas gift for my mom this year. The process for building both pieces was a learning curve, so I didn’t really take great photos of either build. These are a mix of both projects (which is why the tops look different). I already have planned out making some additional templates to use with a trim router to help improve the process for future builds. This project is so great because it ends up using almost every power tool I have. But just like every project I try, there is always something new to learn even when I’ve already built the same thing before!
- One of which was a long shelf for my dad’s hi-fi system; a gift to his new son-in-law. This later became the platform which our G.I.Joe USS Flag aircraft carrier play set lived! [↩]