Angela & I updating our bathroom with new lights, sinks, faucets, and custom mirrors.

After having completed some updates to the other two bathrooms in our house, I have to confess I was somewhat disappointed every time I stepped into our “owner’s” bath, as it was the same old builder-grade stuff. We didn’t want to break the bank in updating it, so we set out with a budget-friendly set of updates we could accomplish ourselves.
You’ll notice that a lot of the images here are out of order, as the work isn’t really done one trade at a time. But I broke this up into the sections of work to better highlight the parts of each.
Lighting
The overall lighting level in the bathroom wasn’t terrible, but I really didn’t care for the look of the single light above the large mirror. I really wanted to put in some wall sconces. In order to do so, we first had to take out the old light. This was mostly a straight-forward process. I wouldn’t be using the existing location (like I did in the other two bathrooms, more-or-less), so I cut out the wall box and then patched over the opening. I ended up having to cut the wiring, as it was (correctly, per code) sealed into the top plate with some fireproofing foam.
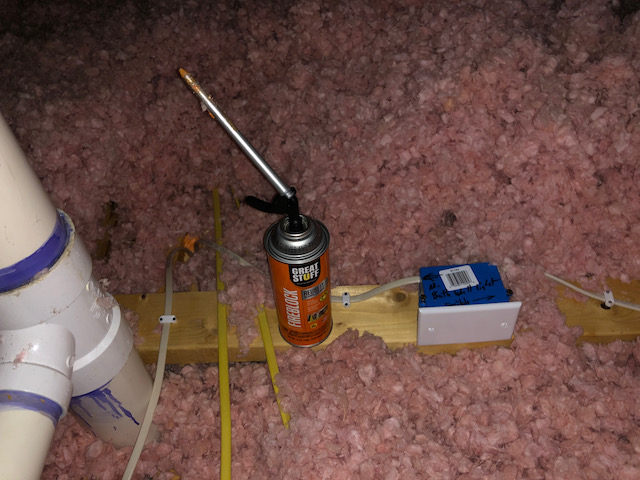
As a result, I had to install a junction box in our attic. I would have to drill laterally through too many studs to use the approach I used to add a second light over the kids’ vanity, so I instead drilled two additional holes in the top plate (I re-used the old, center hole once I freed the cut wiring). I then ran “U” shaped sections of wire to set up the three lights in series from the junction box, which connected back to the wall switch. I put in the old-work boxes and had the lights up in no time. Lastly, I used some expanding fire-proofing foam on the holes in the top plate (no one is ever gonna check, but we’ll know it would pass a code inspection!).

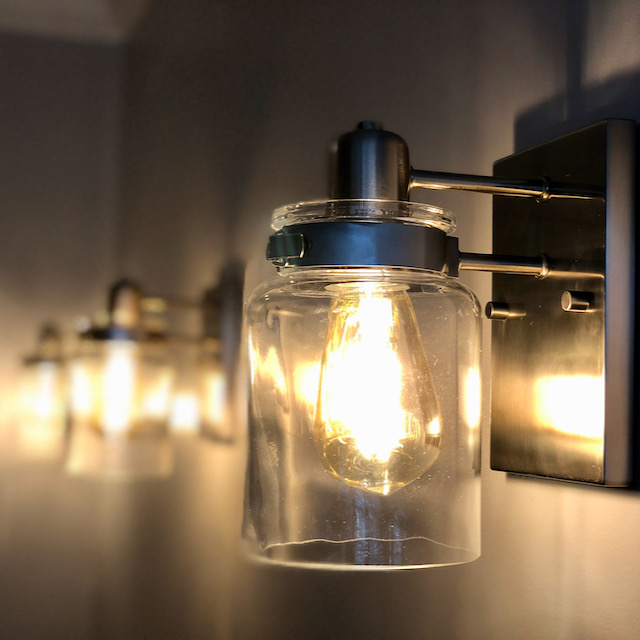
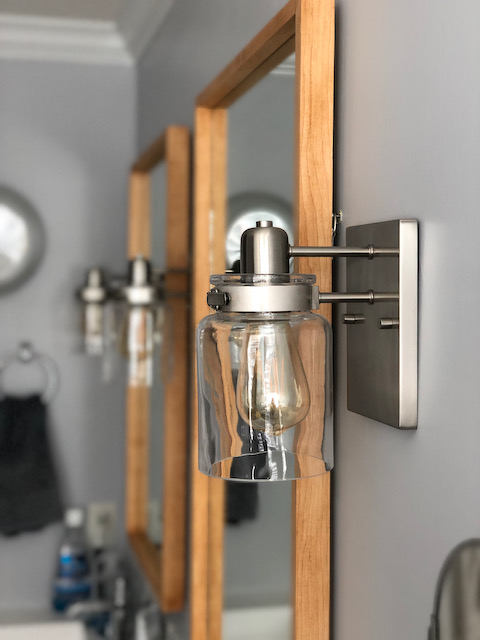
I had ordered some nice-looking wall sconces from Home Depot and used some “Edison” style LED bulbs that I already had. They put out a very “warm” light, but as they’re just above eye level, anything brighter would be too much.
Plumbing
The good news was that since this was already a double vanity, there was no changes needed to the water or drain lines. The bad news was that since this was a double vanity, getting a new top with square bowls was the single most expensive item (by far) of the entire project. Even though it raised the final counter height a bit, we really wanted a slightly thicker top. We found a pretty good deal on an acrylic VersaStone top with integrated sink bowls at Home Depot (it’s out of stock at the time I’m writing this, but Amazon carries a smaller size). Other than the sheer weight of pulling off the old top and then putting the new top in place, this was probably the easiest part of the whole project. The cabinet is a “standard” size, so it fit perfectly.

The vanity top installed and prepping for tiling. 
I had to move an outlet 2″ so it didn’t overlap the tile.
We also managed to get Moen Genta faucets on sale at the Home Depot, too. They were very straight-forward to install except that I had to cut-down the rod connecting the sink stopper to the pull lever, as it jammed in the drain! I did also have to get some water line extensions (why do plumbers install the water lines so low!). So that was a considerable amount of money (nearly $50) for 2″ of line. But the faucets look great with the lines of the vanity top.

Angela also put in a short backsplash with some marble tiles. We ended up having to cut just a few, and I was able to use a grindstone to bevel the edge of a half-piece so it fit in the end. I think Angela has definitely decided that tiling is her DIY job of choice!

Mirror
If you’ve never lived in a spec-built home, let me explain something to you: the mirrors are glued to the wall with construction adhesive or mastic. It’s fast and easy to do them this way, but it is a huge pain to remove them. We lucked out in getting the smaller ones off the walls years ago. But the mirror in our bathroom was 6 feet by 3–1/2 feet. We knew it had to go, but we were more-or-less terrified about splitting it into a million pieces all over our bathroom. I watched a number of YouTube videos about the process and it seemed that prying it off all along the top by driving in wooden shims was considered the best approach. So, I got a very large pack of 14″ shims and then proceeded to tape up the mirror. You may think this was overkill for the tape, but I seriously considered just covering the entire thing! Angela was there for support, both figuratively and literally (do not try something like this on your own!). We went through the entire pack of shims, even going so far as to re-using some that fell down and we could reach. In the end, we had them stacked about four thick. But with a final, satisfying pop, the mirror came free in one piece. It weighed 70 lbs (I did the math), which isn’t a lot for the two of us to carry, but when it’s that large and fragile, it’s pretty scary.

You’re gonna need a lot of shims. No, more than this. 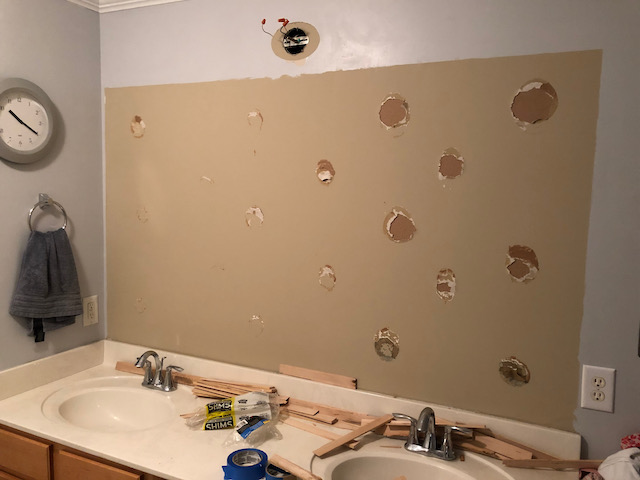
The guy on the left didn’t do as good a job gluing as the other guy.
We had to patch up the walls where the adhesive pulled off the outer layer of drywall paper. I’ve learned the hard way that this stuff is nearly impossible to patch right, even with drywall compound because the inner, brown paper isn’t water proof. It just sucks up the moisture and then bubbles up when painted. Using a repair primer first seals off that paper. We used Zinsser Gardz, because it’s available in a quart (however, I understand Roman Rx-35 Pro-999 is just as good; it just only comes in a gallon and this stuff goes a long way). Just make sure you cut back to sound outer paper and paint it on with a foam brush (it’s like milk). Then you can patch up the drywall with compound, sand, and paint.

Zinsser Gardz works great for re-sealing drywall paper. 
Lots of drywall repair here. Fortunately, we’re getting better at that!
I used some mineral spirits to soften up the adhesive on the back of the mirror once I got it out to the garage floor on some cardboard. A rubber headed hammer and a wide putty knife made short work of scraping it off. I then used a cheap‑o glass cutter and a drywall square to score the front surface along the first cut. I was planning to lower it back over a broom handle as a pivot, but it ended up just splitting as I lowered it! One quick change over underpants later, I repeated to split the smaller side into two final sections.

Mineral spirits and elbow grease are the key to removing construction adhesive. 
It’s good luck when the mirror breaks right where you wanted it to.
I ordered a couple of 6′ long, maple 1x4’s to mill up into some frames. I wanted a narrow, yet deep frame for each. So they were essentially cut into 1x2’s, framed in the “skinny” direction. The boards were pretty rough, with lots of chatter marks and sniping. I don’t have a planar, but I was able to smooth them down with my belt sander. Ripping the pieces into narrow boards certainly relieved a lot of strain, to the point I was concerned I wouldn’t have enough straight sections to make decent frames! But the hockey stick end aside, I was able to measure and miter each board to fit the mirrors. I cut the dados on the table saw. The glue-up for the frames was pretty easy, though having only one band clamp and limited work space meant I had to make one at a time.
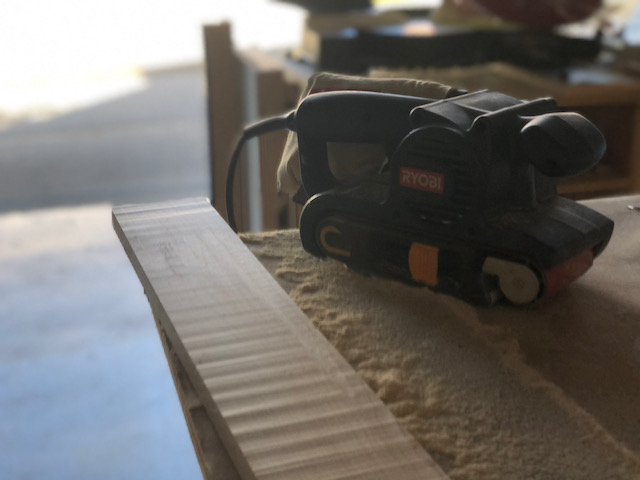
Bad chatter and snipe on these boards, but they were gorgeous maple! 
How do you spell relief? W‑A-R‑P! Seriously, look at that hockey stick I had to shove through the table saw!
I tried using some plain spar urethane at first on a sample piece to try to match the cabinetry, which while also maple is now over 12 years old. It wasn’t nearly a dark enough match, but my son helped me pick out a close color of get stain at Woodcraft to match one of the false drawer fronts. So, American Oak color wiped on very thin and then finished with spar urethane spray does a very good job of matching older maple, if you ever find yourself needing to do such a thing. Just be sure to do a better job cleaning up your glue and wood filler than I did first.

The frames were built around the mirror, which I then lifted out and set aside. 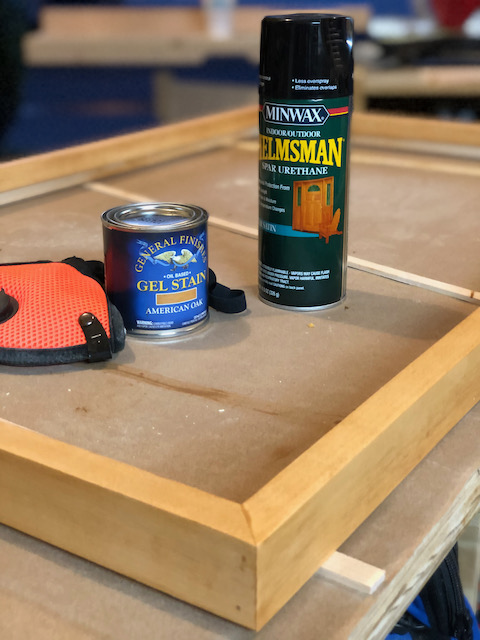
This combo gave me a nicely aged maple color that perfectly matched the cabinetry.
I used an 18gage nailer to reinforce the miter joints from the bottom and top, none of which are visible when hanging. I used some thin foam sheets to pad the mirror and then covered the back with a 1/4″ sheet of plywood. I used a couple of simple metal clips to hold it in place. The narrow frame means that the hanging hooks are visible from the side, but otherwise it’s a very clean and minimal look.
So that’s our final bathroom update! And making those mirrors was a really great experience.