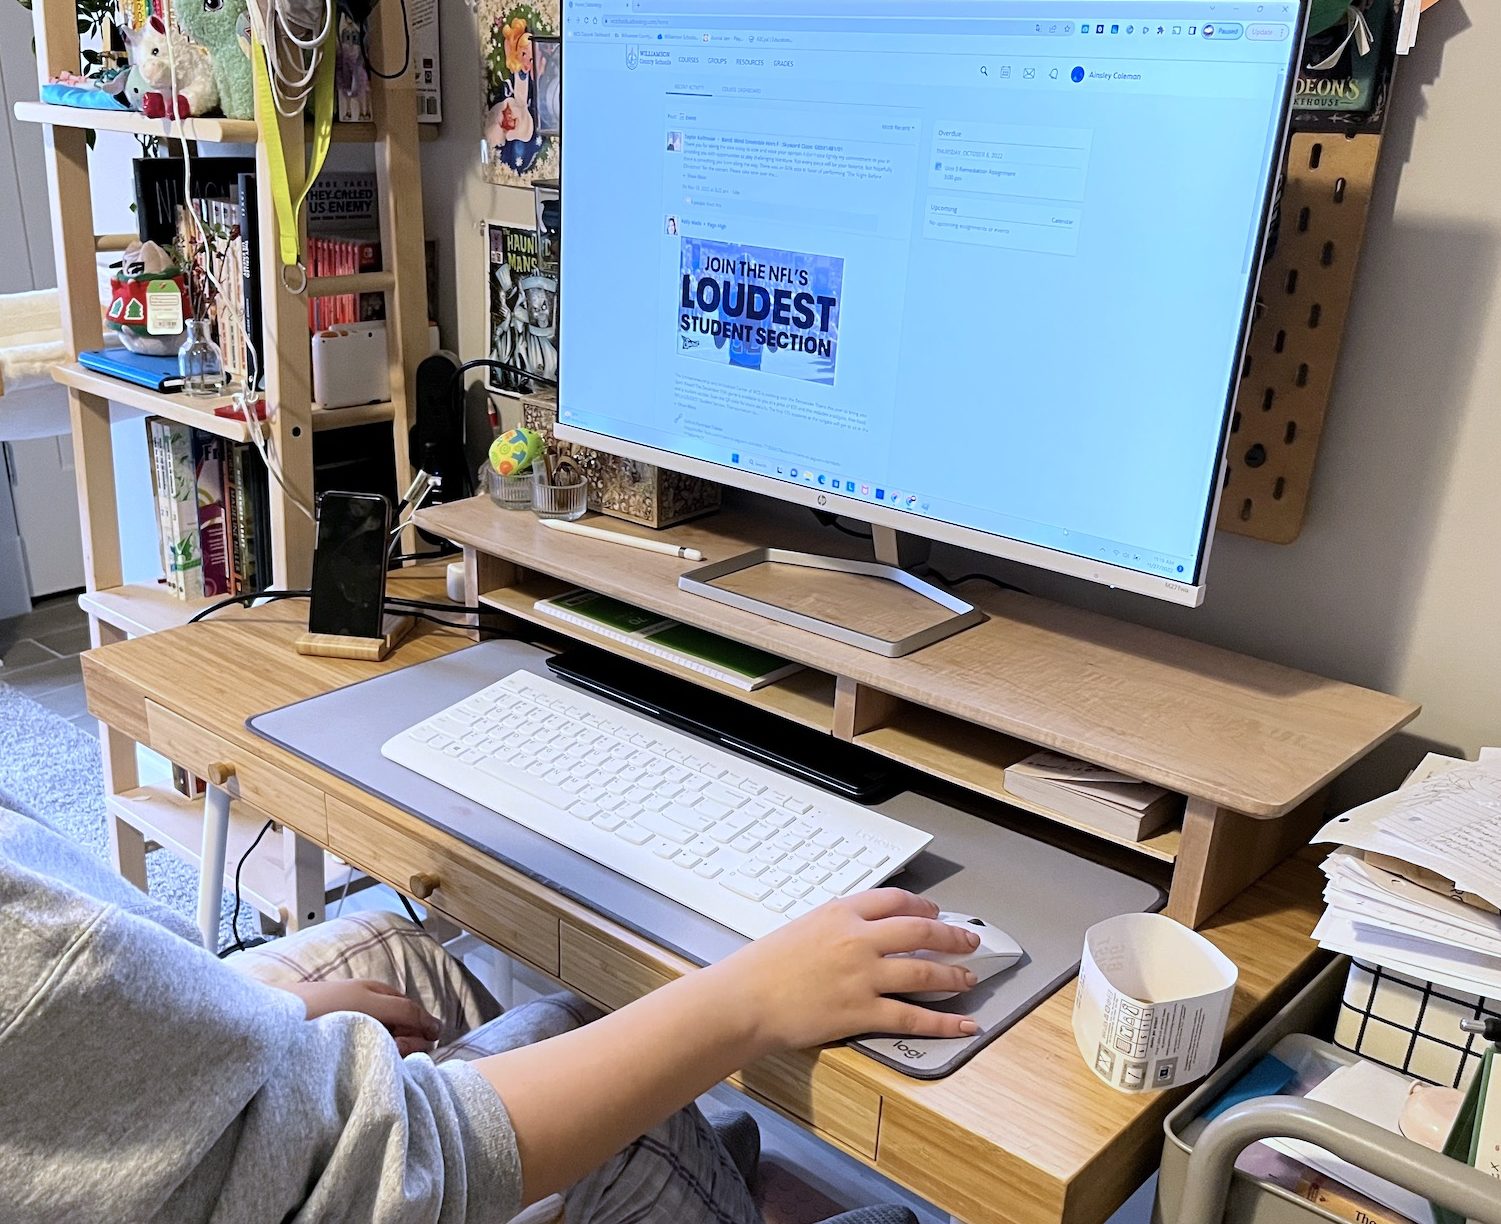
When it comes to woodworking projects, I suppose my daughter is my number one customer. At least, she asks me to make her the most projects and they tend to be very specific requests. So when she asked about getting a hutch/shelf for her fair small IKEA desk, I figured she might find some matching IKEA piece. However, she had in mind something a bit more high-end. She found a solid maple top shelf from Grovemade that cost $300. Mind you, it’s probably a reasonable price for quality, handmade goods. But I figured I could make her one.
She sketched out the dimensions she wanted and then I refined the design a bit based on what was possible. We even went to Woodcraft together to pick out a nice maple board! It was about a 6“x1” board with some nice grain patterns and fairly flat. I ran it through the planar to clean it up on the top & bottom faces. I used my router table with a spiral down-cut, flush-trim bit to joint an edge. I could then clean up the other edge using the table saw.


I used my biscuit joiner to cut slots for alignment biscuits on both the newly cleaned edges. The glue does all of the structural work in the joint. These biscuits are really just there to help keep the faces flush during assembly. The legs were similarly glued up so as to have the grain running up/down the leg rather than showing the end-grain on the front side. However, they were small enough to just clamp together within the need of biscuits.
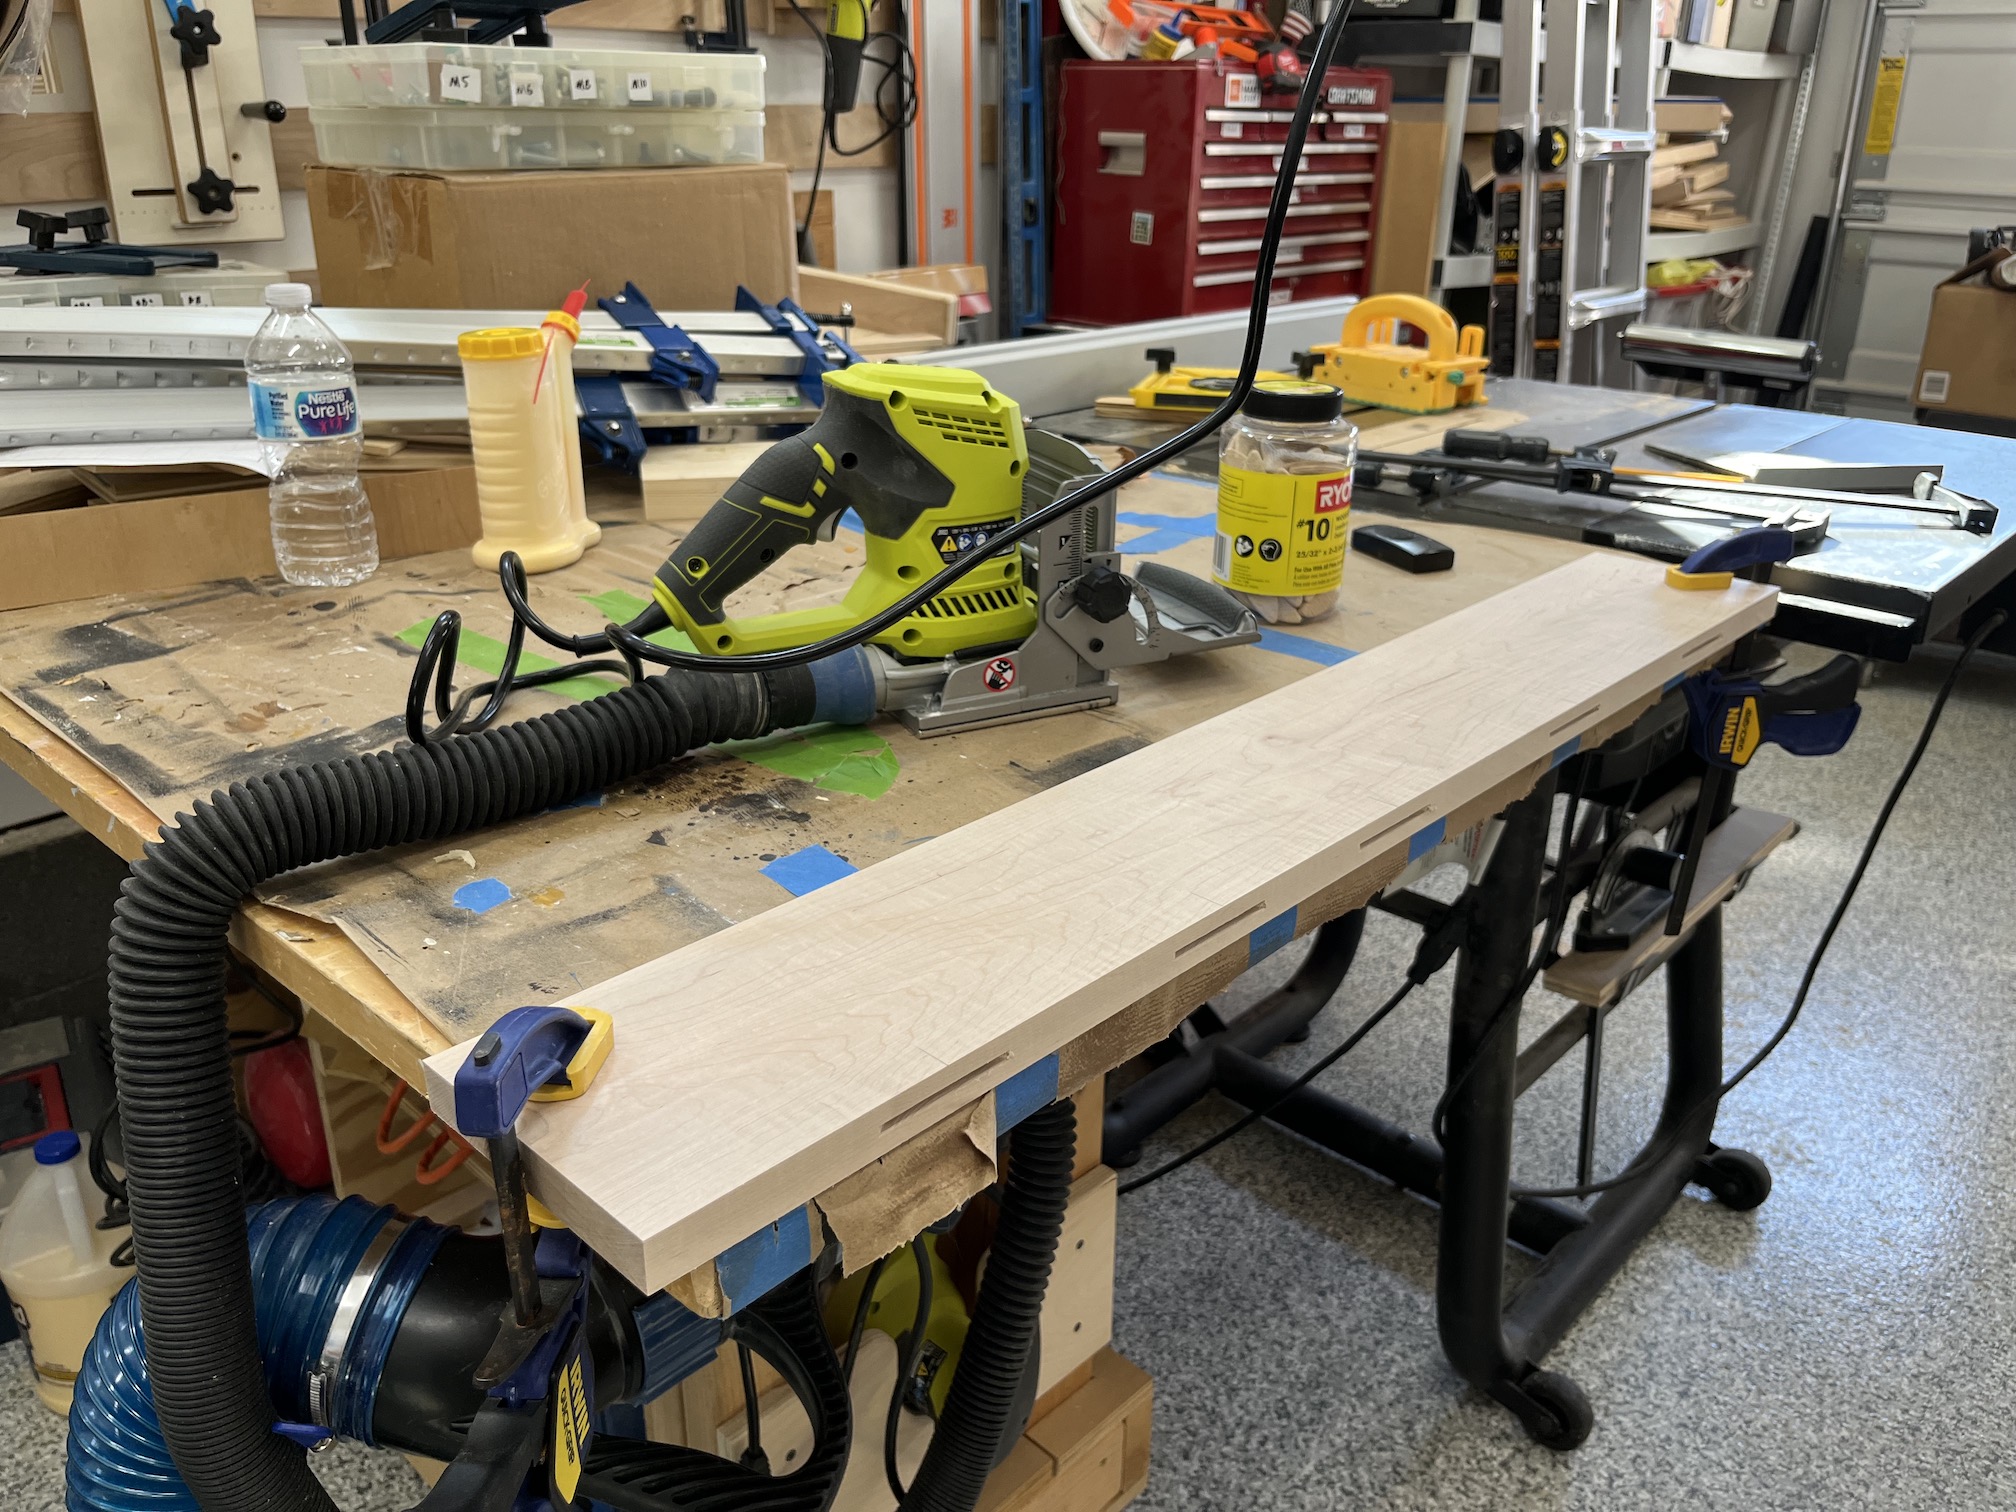
I knew I wanted to have a chamfered edge to give the overall piece a slimmer appearance. The reference piece appears to have 45° edges, but I wanted a small edge with a steeper chamfer below. So I purchased the cheapest 60° chamfer router bit I could find. These can be very pricey and I wasn’t sure I’d have a use for it after this project anyway. I suppose I could get away with using this a few more times, but I don’t think it would stay sharp for long. And honestly, using that large of a bit in my router was more than a little terrifying. Fortunately, this maple cut very easily even with the cheap bit. I managed to not take any photos of that process, though (probably too busy fearing for my safety!).

The far easier (and less terrifying) router process was cutting some “blind” slots in the legs. I do happen to have some “undersized” straight router bits which are the common thickness for plywood. So I could start the cut by dropping the leg piece down on the bit and then pushing it on through. Combined with a notch in the corner of the shelf, this makes for an “invisible” support slot once assembled. The shelf is made from 1/4″ plywood (which, in case you didn’t know, is actually 7/32″ thick), which was the only part which wasn’t solid maple. However, I did manage to use some of the thin rip off cuts from the jointing process to glue on a solid edge to the shelf.

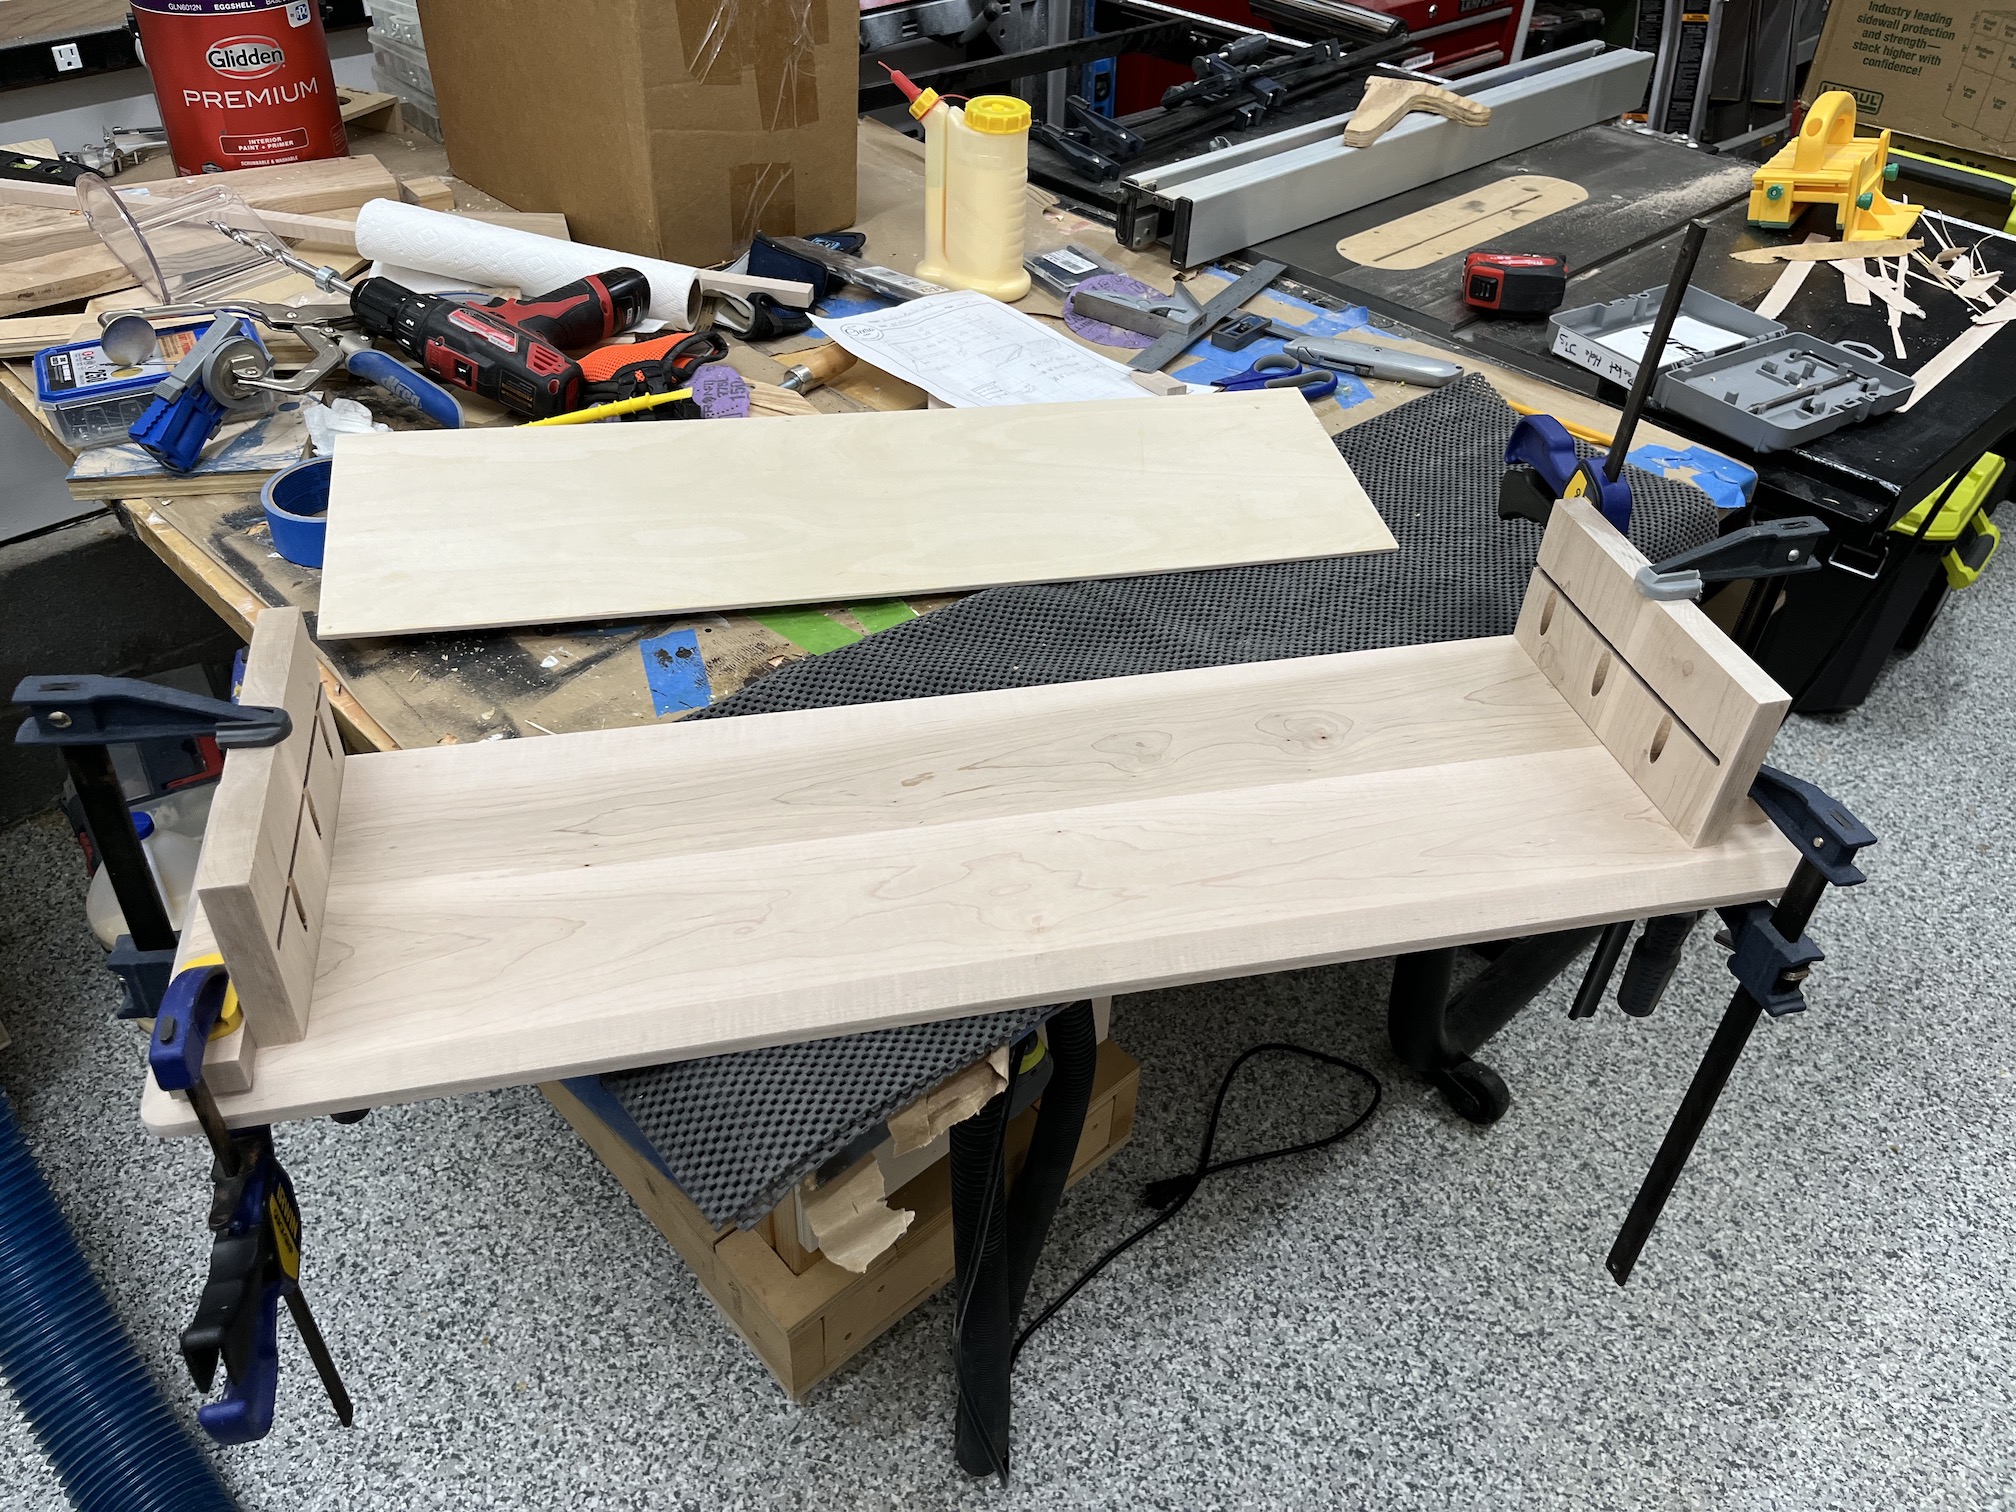
Now, woodworking purists should probably just stop reading here. Why? because I just used pocket holes to attach the legs to the top. I had considered using some threaded inserts and long bolts (as I did with the center shelf support), but they would have just interfered with the slot I had already cut. So, in the interest of keeping things simple, I just used pocket holes. They’re not visible at all when this is being used and allowed me to disassemble the piece for finishing.

The center support is really just glued up from a lot of scrap off-cuts. I notched out the front of the shelf there as well to accommodate a slightly longer front edge just for some visual interest. This support is attached with some 2–1/2″ long machine screws into some brass threaded inserts. Those were fairly easy to install but drilling out the hole for these proved to be very tough as the brad-point bit poked through the top of the shelf on one! Ouch! I managed to patch up the tiny hole with some black CA glue, but worth noting to be very cautious when using these in the future.


Then came lots of sanding and finishing. I used Total Boat brand Halcyon again, as it’s just very forgiving. I put four coats on all the pieces and sanded it with 400 grit after the last coat. I even took a very fine finish pad to the top shelf surface to give it a really nice feel. I cut some strips of shelf liner and glued those to the bottoms of the legs using some spray adhesive. These will serve as both padding and to prevent the shelf from sliding around. Of course, I had to add my Cicero Crafted stamp to the finished piece once it was complete!

I have to say that the few projects where I’ve taken a rough-sawn piece of wood and then milled it and shaped it into a final piece like this have been really exciting. There is just this really great feeling at seeing a piece of that rough lumber next to this finished piece. Knowing that there was a nice piece of furniture or frame in there and I found it and made it real is awesome.