I almost made through August without posting about a project. Then again, I almost made it throughout August without actually completing a project, as well.

I decided to get around to a project I’d been wanting to do for a few years now: a cart for my drill press. This is part of the bigger project to revamp my garage shop and, eventually, clean up the garage as a whole. I started by tearing our an old workbench and putting my bandsaw and power sander on a cart. That bench was also where my drill press resided since I first got it and it had been moved to my main bench (along with all the other junk in my garage it seems). So the idea would be to make a relatively small cart with some drawers and storage for “drill” related items. I’m pretty pleased with how everything turned out, especially since there were a few new skills on this one.
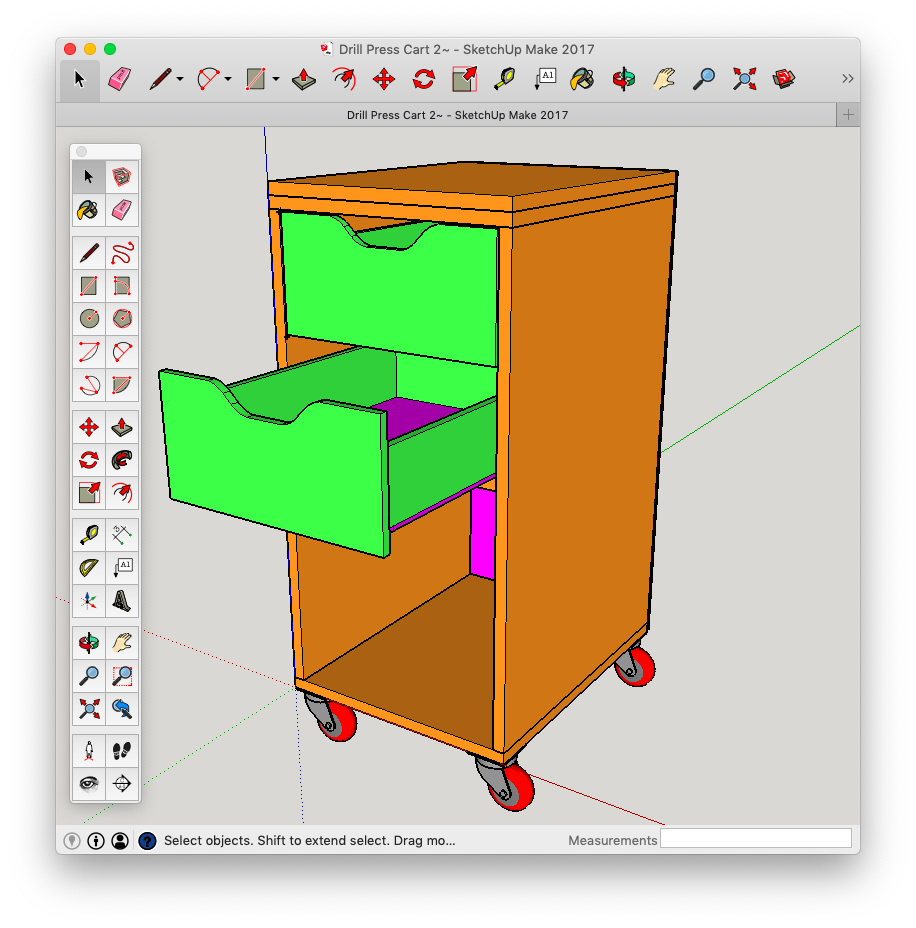
First, I decided I’d model the project in CAD so I could make sure everything fit. I would be making drawers on slides for the first time, so I figured it was important to get the measurements right. I ended up using SketchUp since they have a free version for makers (that runs on the Mac). It’s a pretty nice program and I figured out to model my project as well as generate a cut sheet.
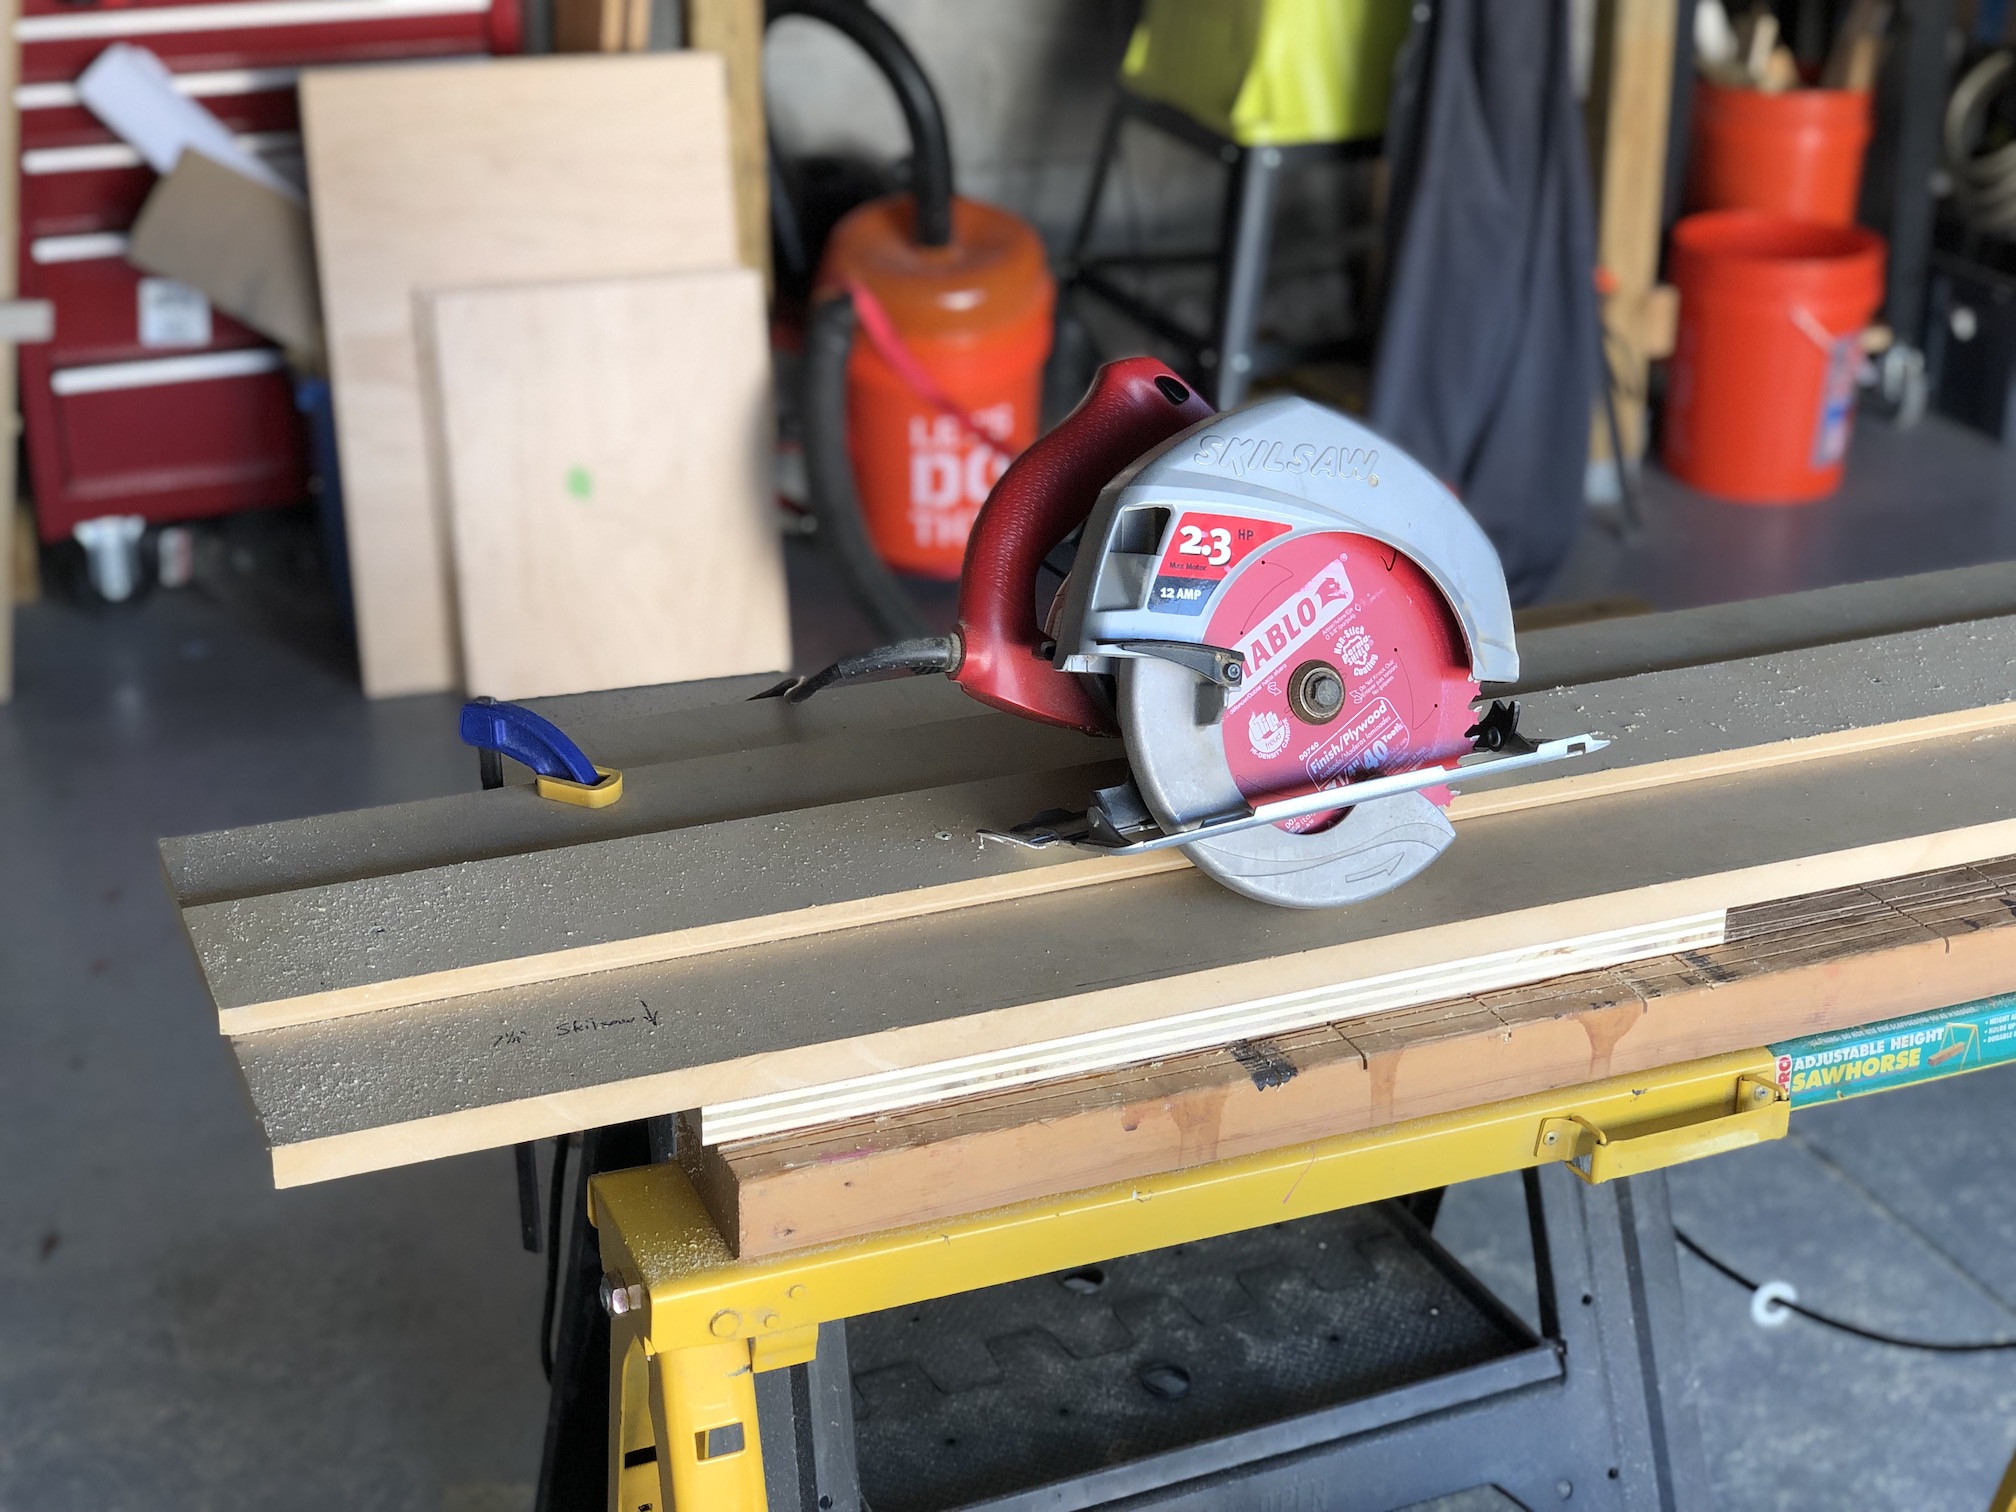
This morning I got to actually cutting and assembling. The cabinet for the cart isn’t especially large, but almost everything was larger than I could actually cut on my table saw. So I had to break down most of the pieces using my circular saw and my homemade track. It’s a more tedious setup and it has the drawback of not being able to make repeat cuts. I managed to make a passably square cabinet carcass. My assembly jigs came in handy getting the carcass together, too. I used pocket holes and glue.
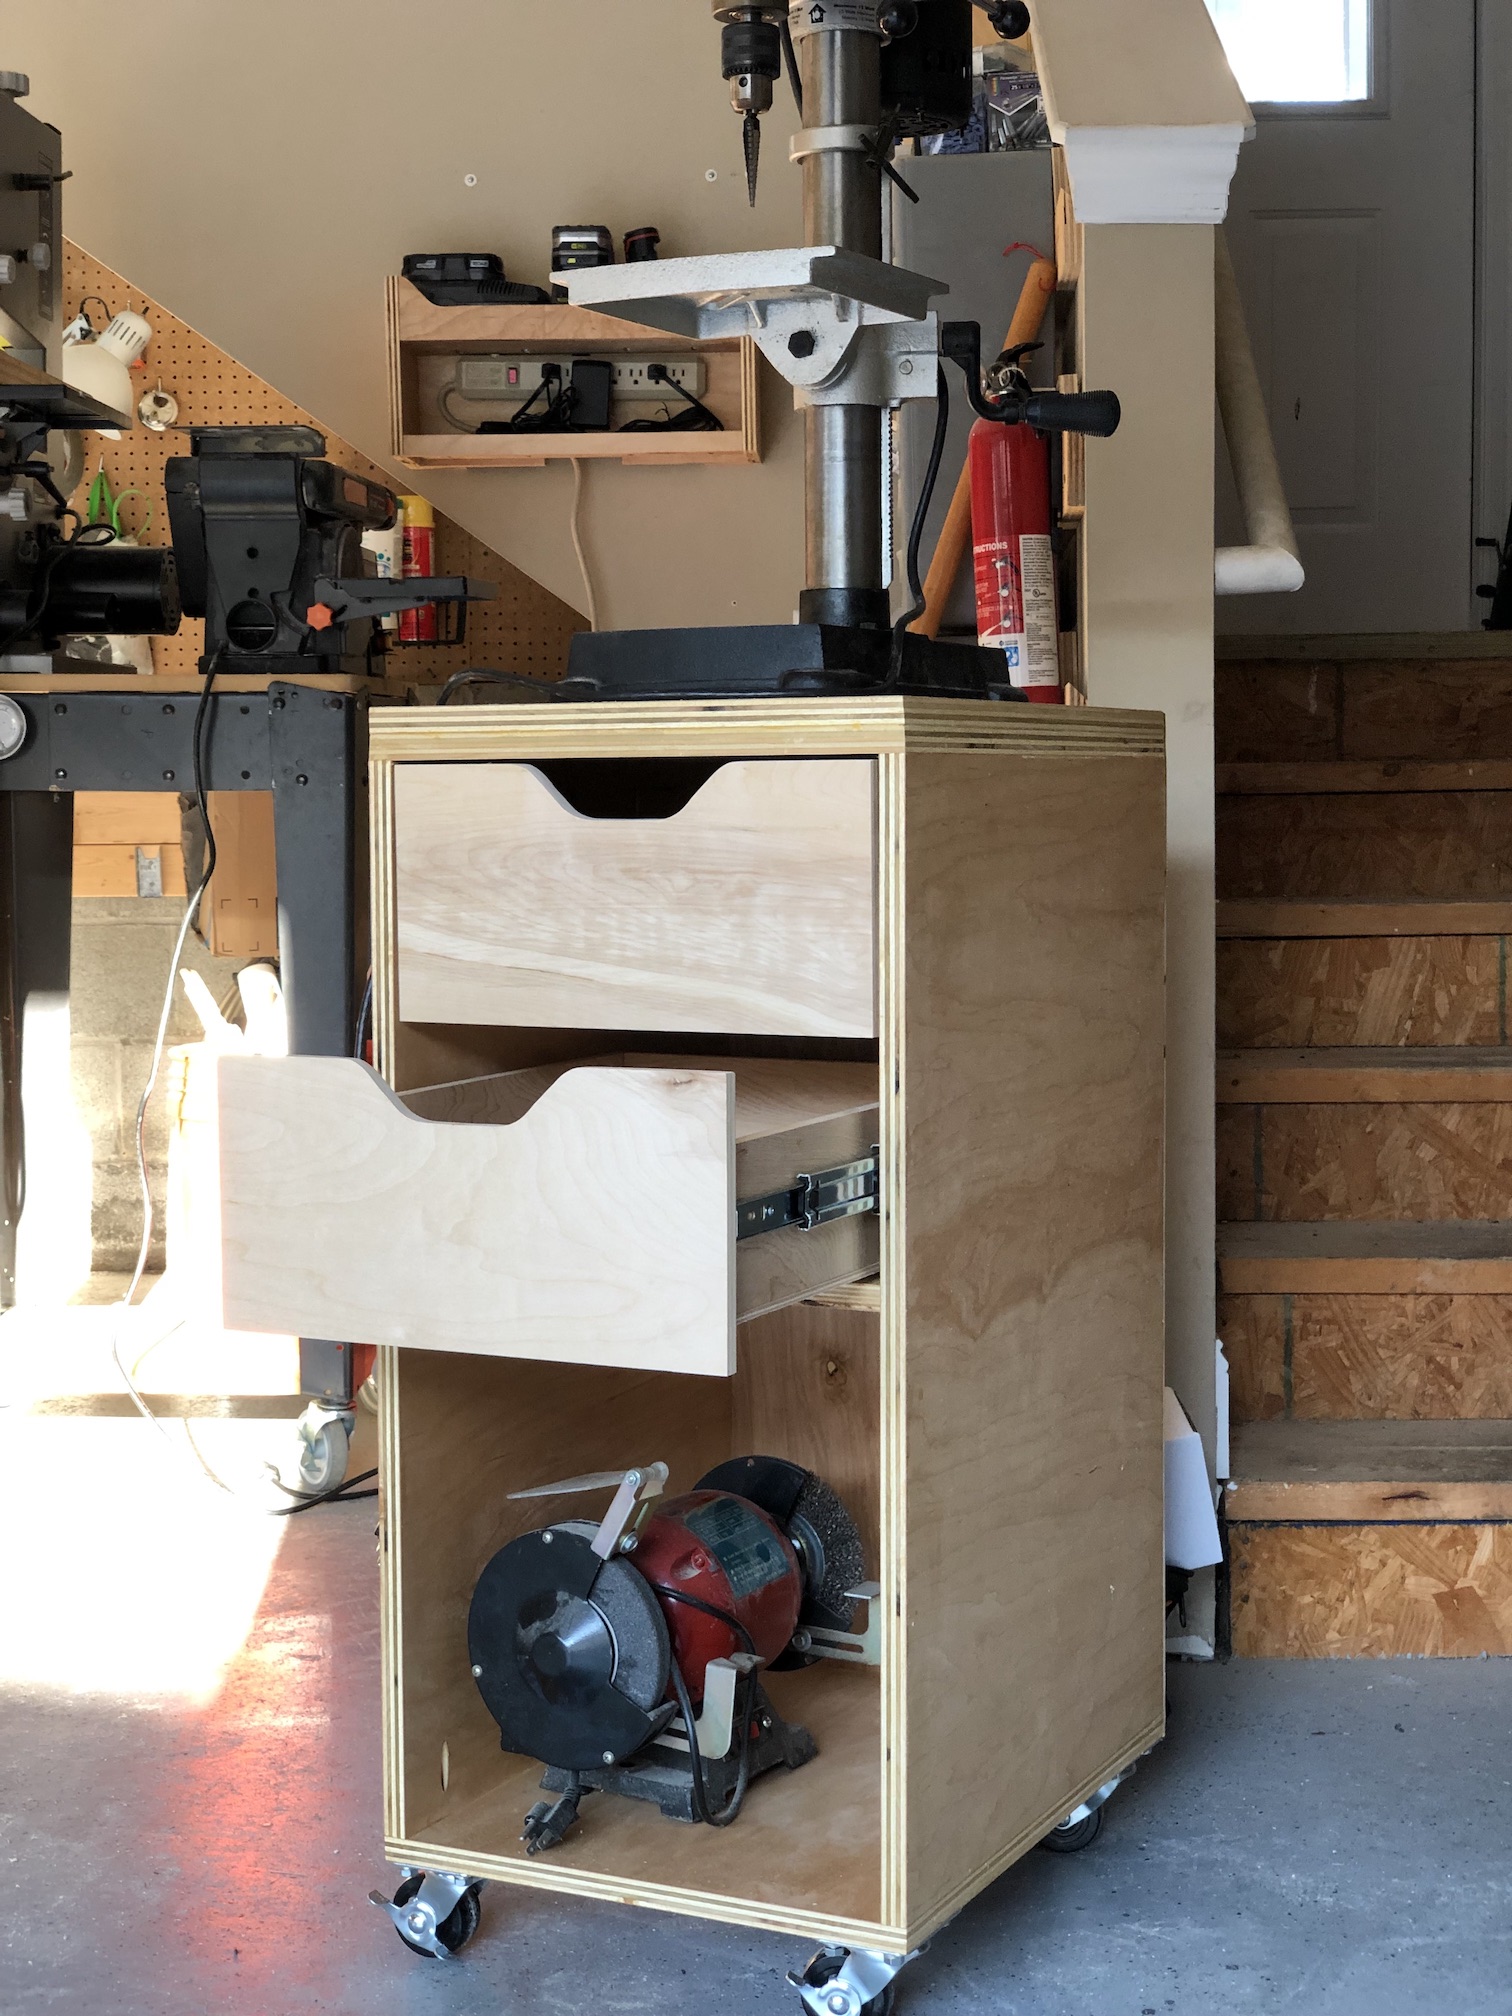
I also followed April Wilkerson’s advice and glued up a double-thick top (1.5″ total of plywood as the entire cabinet is 3/4″ maple plywood) as the drill press is heavy and will cause long-term sagging if not well supported. I differed from her cart as a intentionally had the sides butt onto the top and bottom such that the pocket hole / glue joint isn’t in direct shear from the load. It exposed the pocket holes in the lower cabinet opening, but no one in the garage is going to complain. This also allowed me to place the castor at the very corners of the bottom shelf without concern of the lag screws splitting the sides.

I had an existing piece of 1/4″ birch plywood that I used for the back panel. Before attaching it, I added in the divider which is hidden by the bottom drawer. This goes to add a bit of stability to the cart and also helped in installed the drawers. I used a trim router bit to clean up the 1/4″ back as it was just slightly wider than my 16″ width. The carcass was just a bit off square, but I was able to nudge it just a bit when screwing on the back such that it trued up. That’s where taking some time with the main butt / pocket hole joints paid off.

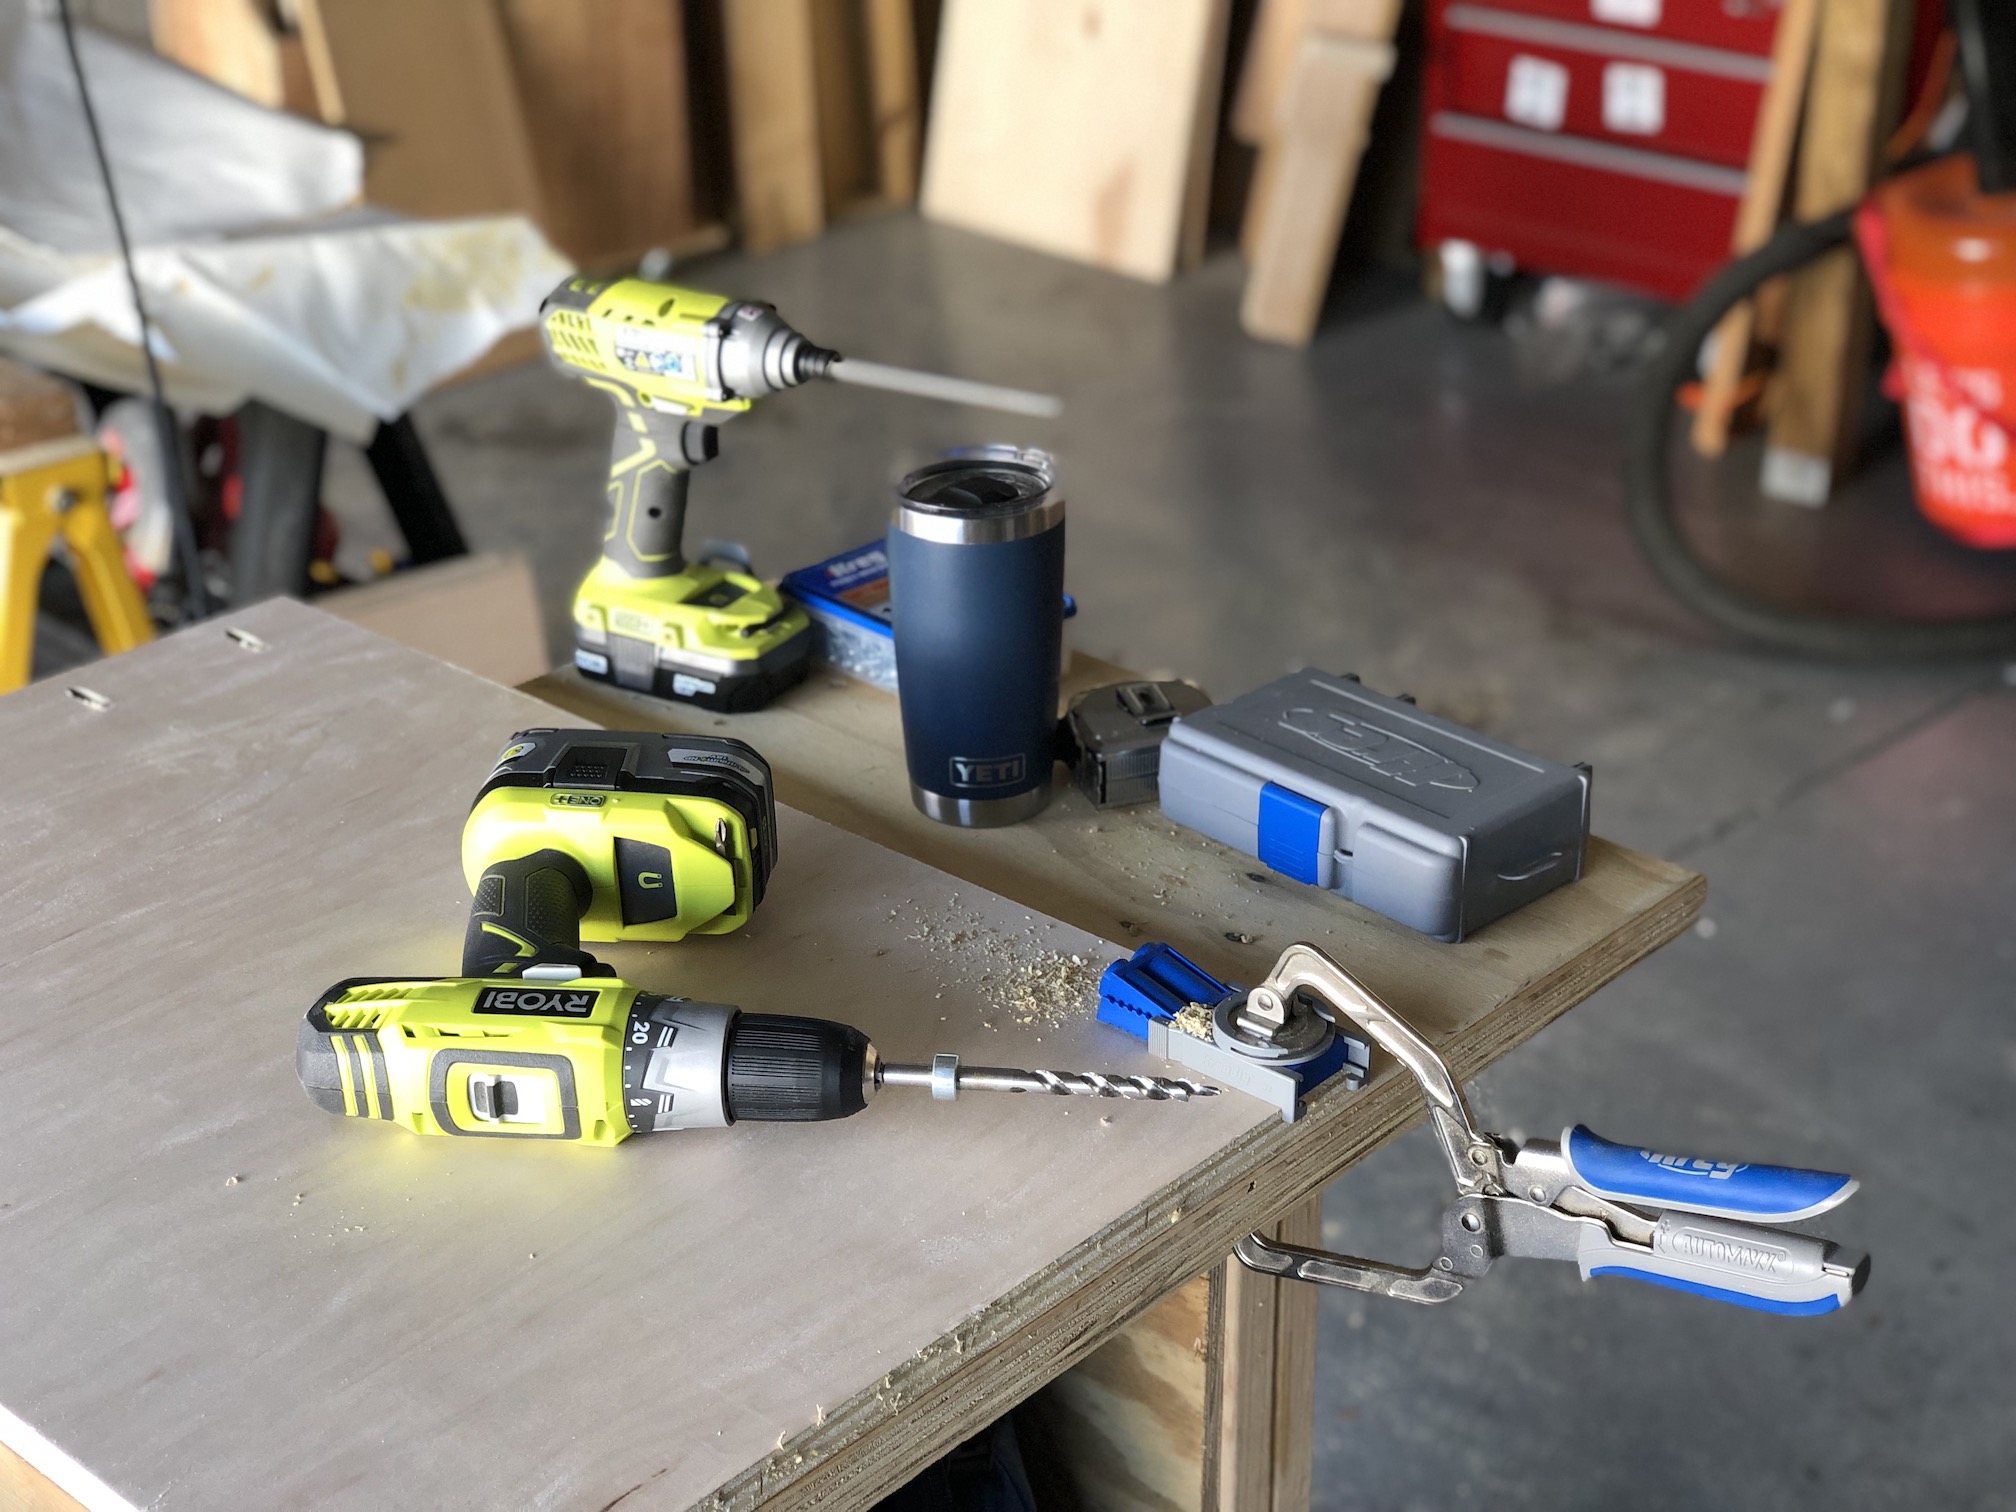
While the wipe-on poly was curing on the main cabinet, I got to work on the drawers. I used Brad Rodriguez’ general design for the drawers. Once I broke down the 1/2″ birch plywood into two pieces, I could finally batch out the drawer pieces on the table saw. I set up the fence to rip the false fronts and the moved the fence again to rip the 4″ drawer sides. I made sure to place the drawer slides and sides into the cabinet opening to measure for the width. I could then use my cross-cut sled to get my final pieces. Of course for the 1/4″ plywood drawer bottoms, I still needed to use the circular saw. I assembled the drawers with pocket holes (laid out such that they’ll be hidden once in place. You may notice that I didn’t use drawer pulls but went with just notched handles (again, somewhat inspired by April Wilkerson here along with some of our IKEA drawers). This coincidentally allowed me to easily clamp on the false fronts while getting them attached. I used the band saw to cut out the notches and then the power sander just to clean things up and get right up to my lines (and I should add that having those on a cart is also great!).

Getting the drawer slides installed was pretty straight forward, although I managed to get the spacing off some. Nothing critical, just that the slides are at different depths on the top versus bottom drawer. As of right now, the drawers are only held together with the pocket holes and 5/8″ screws for the bottoms. I did this to “dry fit” them as I wasn’t 100% sure they’d fit in the slides (it’s tight to be for sure). If they don’t bind up as I use them, I’ll probably take them back apart and glue them together. I probably would have done so today, but this “small” project ended up taking me over 8 hours so I just swept up the garage and called it a day. The good news is that I had some additional storage to put things away when cleaning up that I didn’t have this morning!
Here are the Sketchup files for the 3D assembly (shown above) as well as my cut sheets. Bear in mind the cut sheet was done for the specific pieces of plywood I had on hand, and won’t necessarily be the most efficient if you have full sheets (or sheets of any other size).
Lastly, these are the soft-close drawer slides I used (Amazon affiliate link). If you use any different slides, you’ll need to take into account the width of those when cutting the drawer pieces. These are exactly 1/2″ on each side, which makes for easy math. I used 18″ length, which allows me to fully extend the drawers.
Do you have the Sketchup file for this?
Hi Michael. Yes, and I’m glad to share them. I hadn’t thought about that until you asked. The assembled cart and cut sheet files are now linked at the end of the post.