
I purchased a Bosch router table as it had essentially everything I need out of a router table at a cheaper price than buying components individually. It’s a “benchtop” model, but when placed on a standard bench the table top then sits at about armpit level, which is probably not the safest method to use a router. Also, as I’m collecting router bits and accessories, I find myself needing some dedicated storage for those items. So I decided to built a cart to sit the table on with some drawers. I had plenty of extra plywood (3/4″, 1/2″, and 1/4″) for the project without having to purchase anything specifically for this.
My design just started off as a set of rough measurements for the target height and the table width & depth. I then subtracted out the height for some casters. This gave me the overall dimensions for a cabinet carcass. I figured it was time to try to make some rabbet joints for this carcass. A rabbet is a channel cut along the edge of board to accept a perpendicular board. You’ve probably seen it before even if you didn’t know what it was called. This allows for two planes of gluing surface at the joint, which makes the joint remarkably stronger. I recently got a dado blade set for my table saw and figured this was a perfect time to try this joinery method out.1
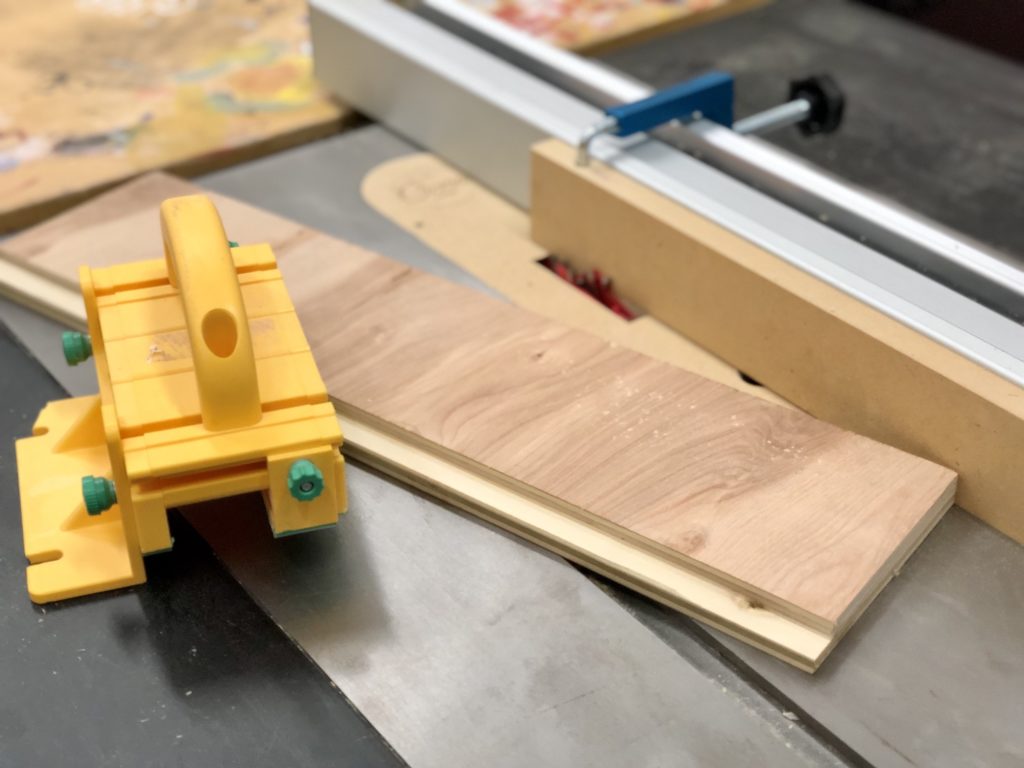
First Dado Cut 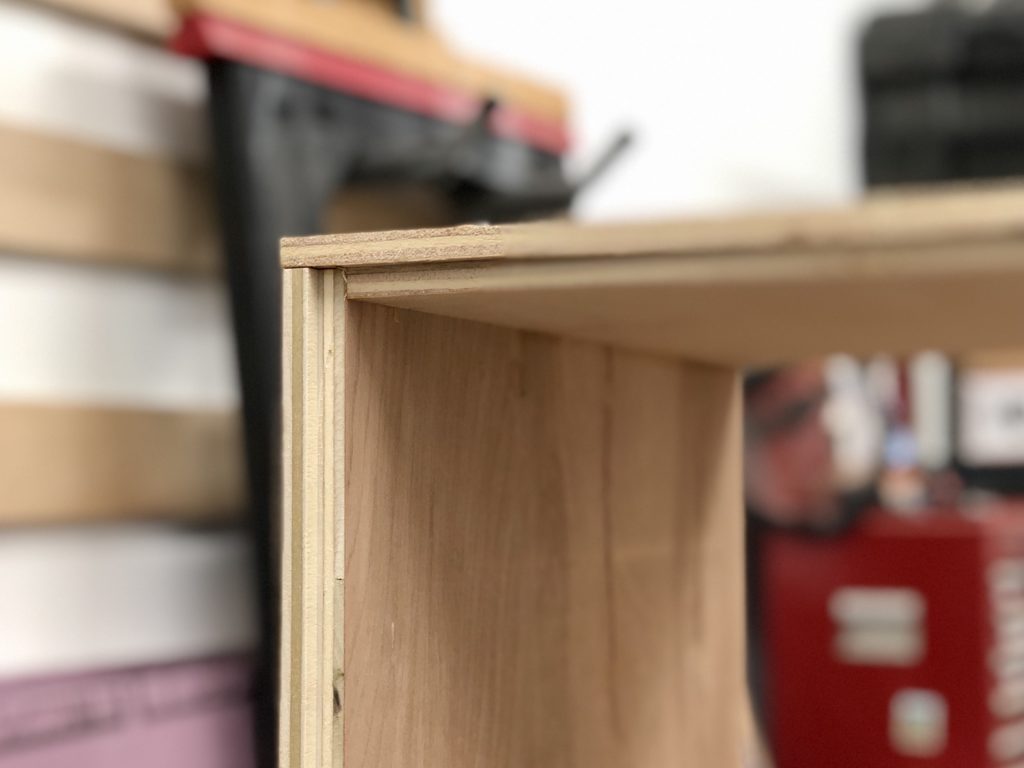
Rabbet Joints


I cut the 3/4″ x 3/8″ rabbets along all top and bottom panels. I then cut a 1/4″ x 3/8″ rabbet along the back edge of the top, bottom, and side panels to accept the rear panel of the cabinet. The other nice thing about this method of joinery is that it really requires only glue. No mechanical fasteners are necessary. I will say that I was able to get the carcass mostly square just by gluing up the top, bottom, and side panels. I really should have glued the back at the same time and that would have ensured the entire box was square, but I just didn’t have enough large clamps. It’s square-ish and functions fine, but I can see the gap around the drawer faces isn’t consistent.

I built a couple of drawer boxes out of 1/2″ plywood. These were joined with simple pocket holes. The 1/4″ plywood bottoms were glued and brad nailed into place. I removed one of the drawer fronts from my drill press cart to trace the hand cutout onto the new drawer fronts. I quickly cut these on the bandsaw and then sanded them down to a smooth shape. Even though it may let some dust in, I like the simplicity of using these cutouts instead of drawer pulls.
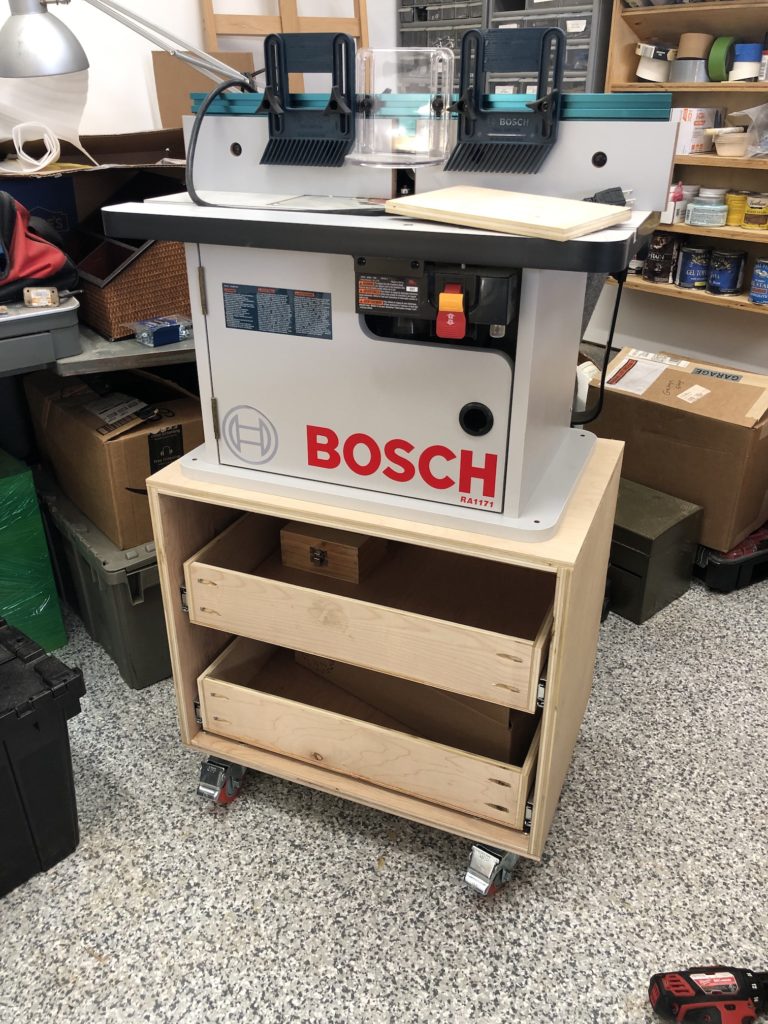
Drawers Installed 
Drawer Fronts Added

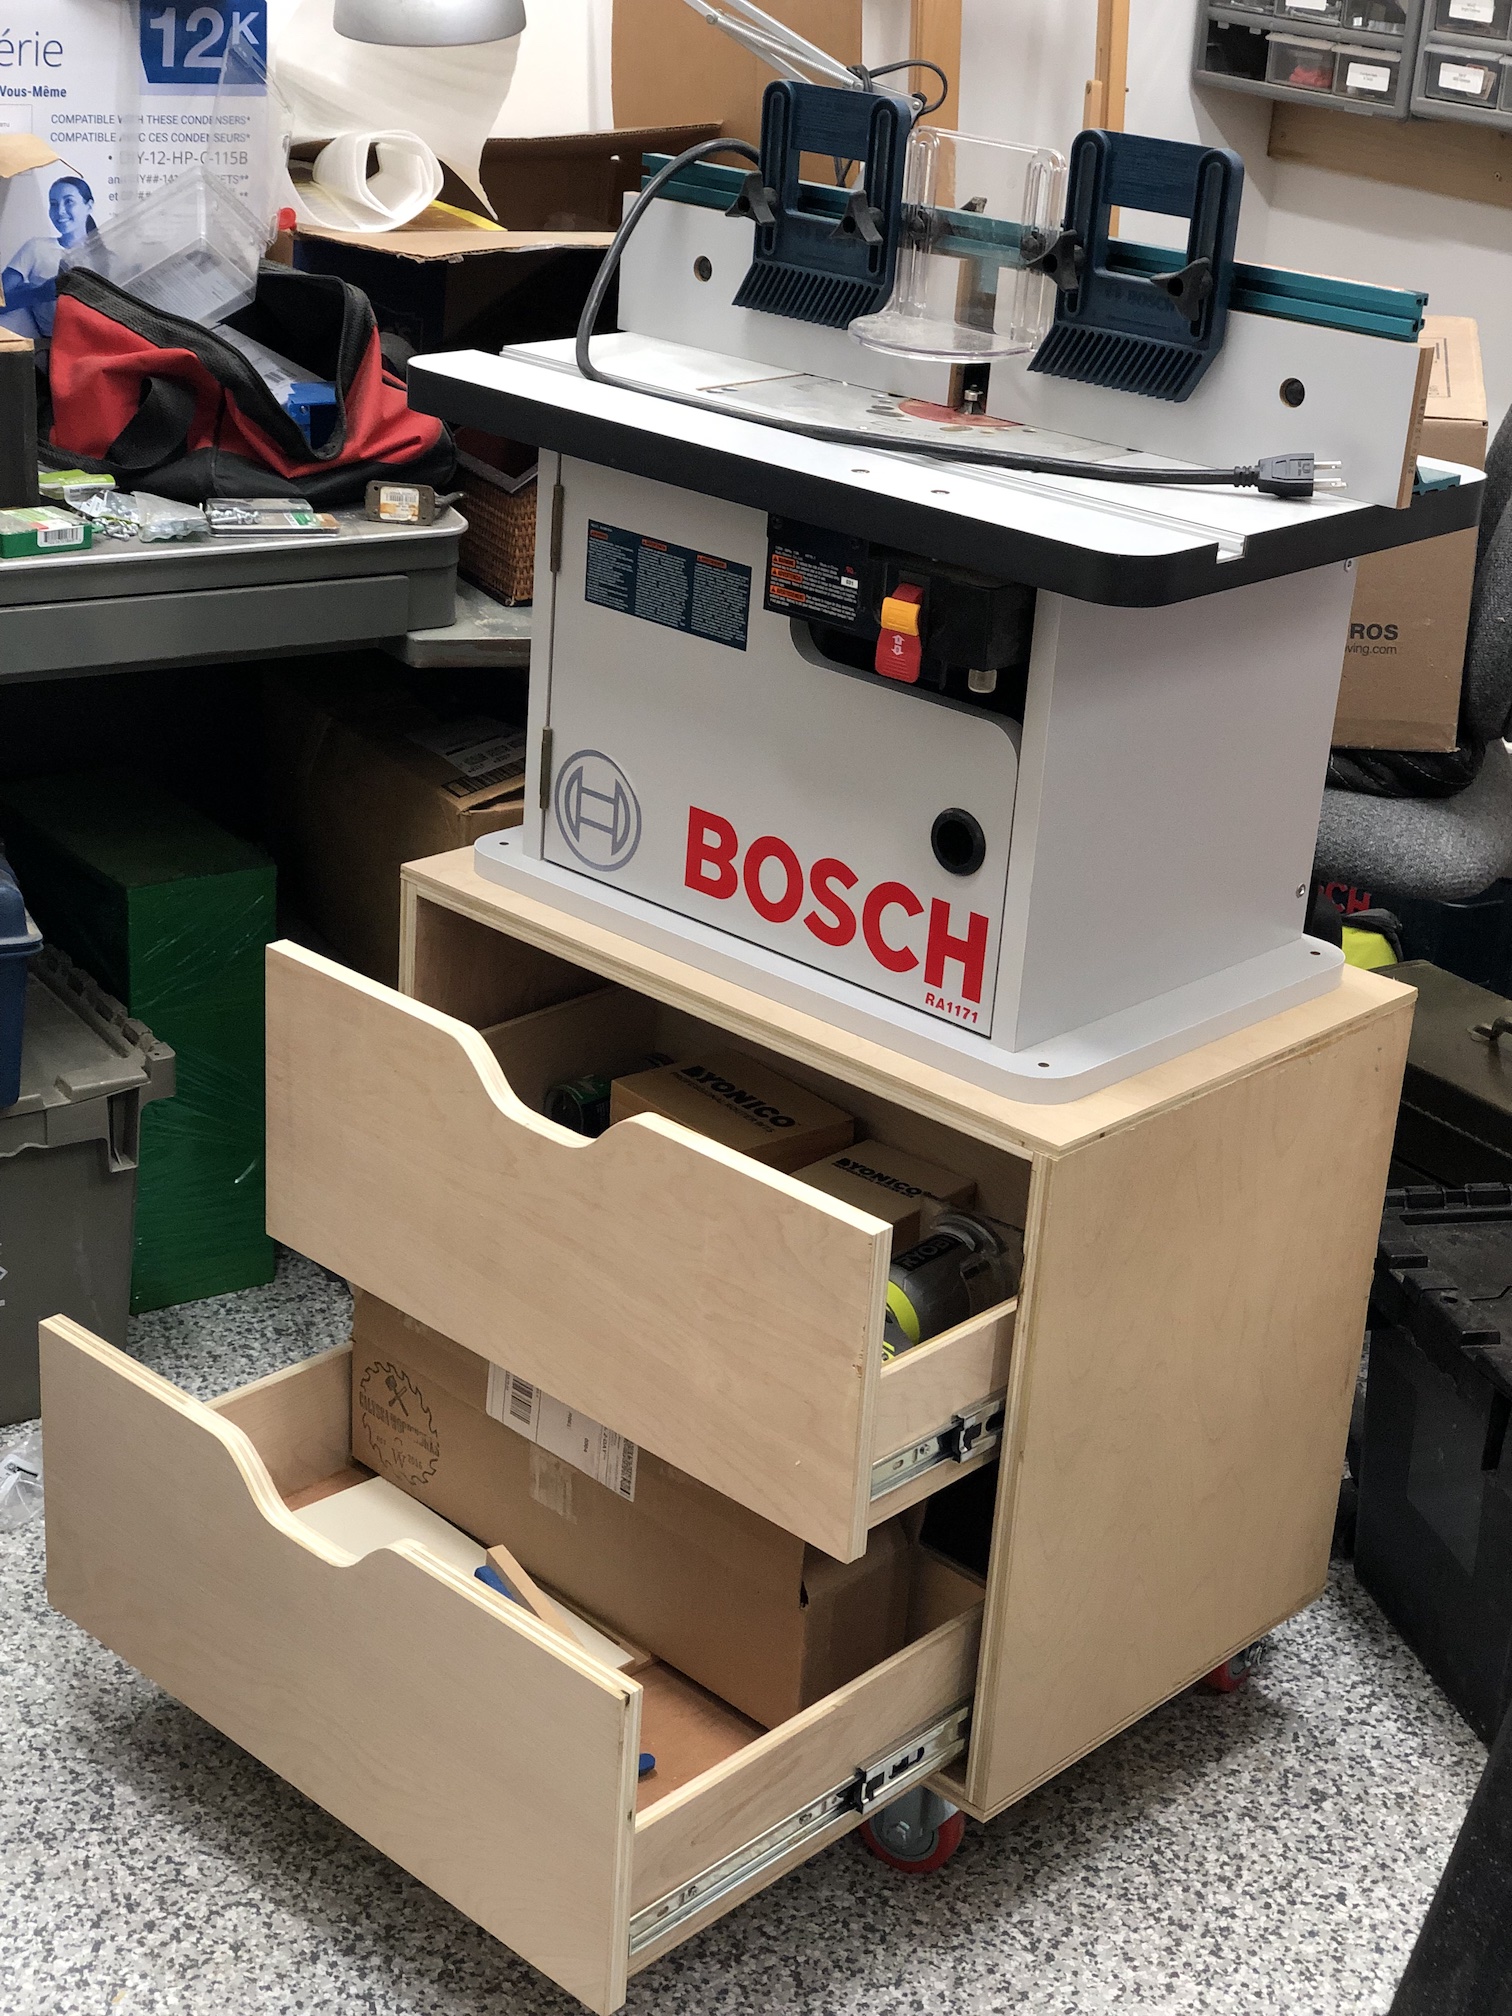
The drawers themselves are only 4″ deep but the drawer space for each is about 9″, which allows me to store jigs, router bit boxes, etc. along with my trim router. I got some 2–1/2″ flexible hose and a splitter so I can hook up my 4″ dust collector quick-connect to the router table. I still need to get the quick-connect mounted to the side of the router table. I should probably also do a quick sanding and add some finish to the outside of the cart. But it’s entirely functional and already has helped organize my routers, bits, and accessories.
Sketchup Model of Router Table Cart (cut sheet data included here as well)
- I did actually use dados and rabbets on a small marker storage box for my daughter several years ago, but that was all done with a standard blade rather than a dado stack. [↩]
1 comment